
How to photograph real estate with your cell phone (and acutally get good results!)
By Kristin Boyer, K. Boyer Real Estate Media
Let me be honest with you — I photograph real estate for a living, and I'm not here to tell you to always hire a professional. Sometimes a listing just doesn't call for a full production shoot. A small rental refresh, a quick price-reduction update, an investment property that needs to move fast — I get it. Life is busy, budgets are real, and not every home needs a cinematic video.
But here's what I will say: every listing deserves better than a blurry, orange-tinted, tilted phone photo that makes a perfectly nice home look like a crime scene. And most of the time, bad listing photos aren't about the phone — they're about not knowing a few simple tricks that make all the difference.
I've been doing this long enough to know exactly what separates a decent phone photo from one that makes a buyer stop scrolling. So here it is — everything I'd tell a friend over coffee.
Start Here: Get Your Camera Settings Right First
Before you walk through a single door, get your phone set up properly. Most agents skip this part entirely, and it shows. 1. Switch to the .5 ultra-wide lens
On an iPhone, tap the .5 on your camera app. This switches you to the ultra-wide lens, and it is a game-changer for interior photography. It opens up every room, makes tight spaces feel livable, and gives buyers the kind of expansive view that actually makes them want to see the property in person. This one change alone will immediately improve every photo you take indoors. 
rule of thirs… top 1/3 is the sky, middle 1/3 is the lake and bottom 1/3 is the land/trees.
2. Turn on your grid lines
Go to Settings → Camera → Grid and turn it on. You'll see a tic-tac-toe grid overlay on your screen — that's the rule of thirds, and it's the foundation of good composition. The goal is to place your main subjects (doorways, windows, focal furniture) along those lines rather than dead-center. It sounds like a small thing, but it makes your photos feel intentional instead of accidental. 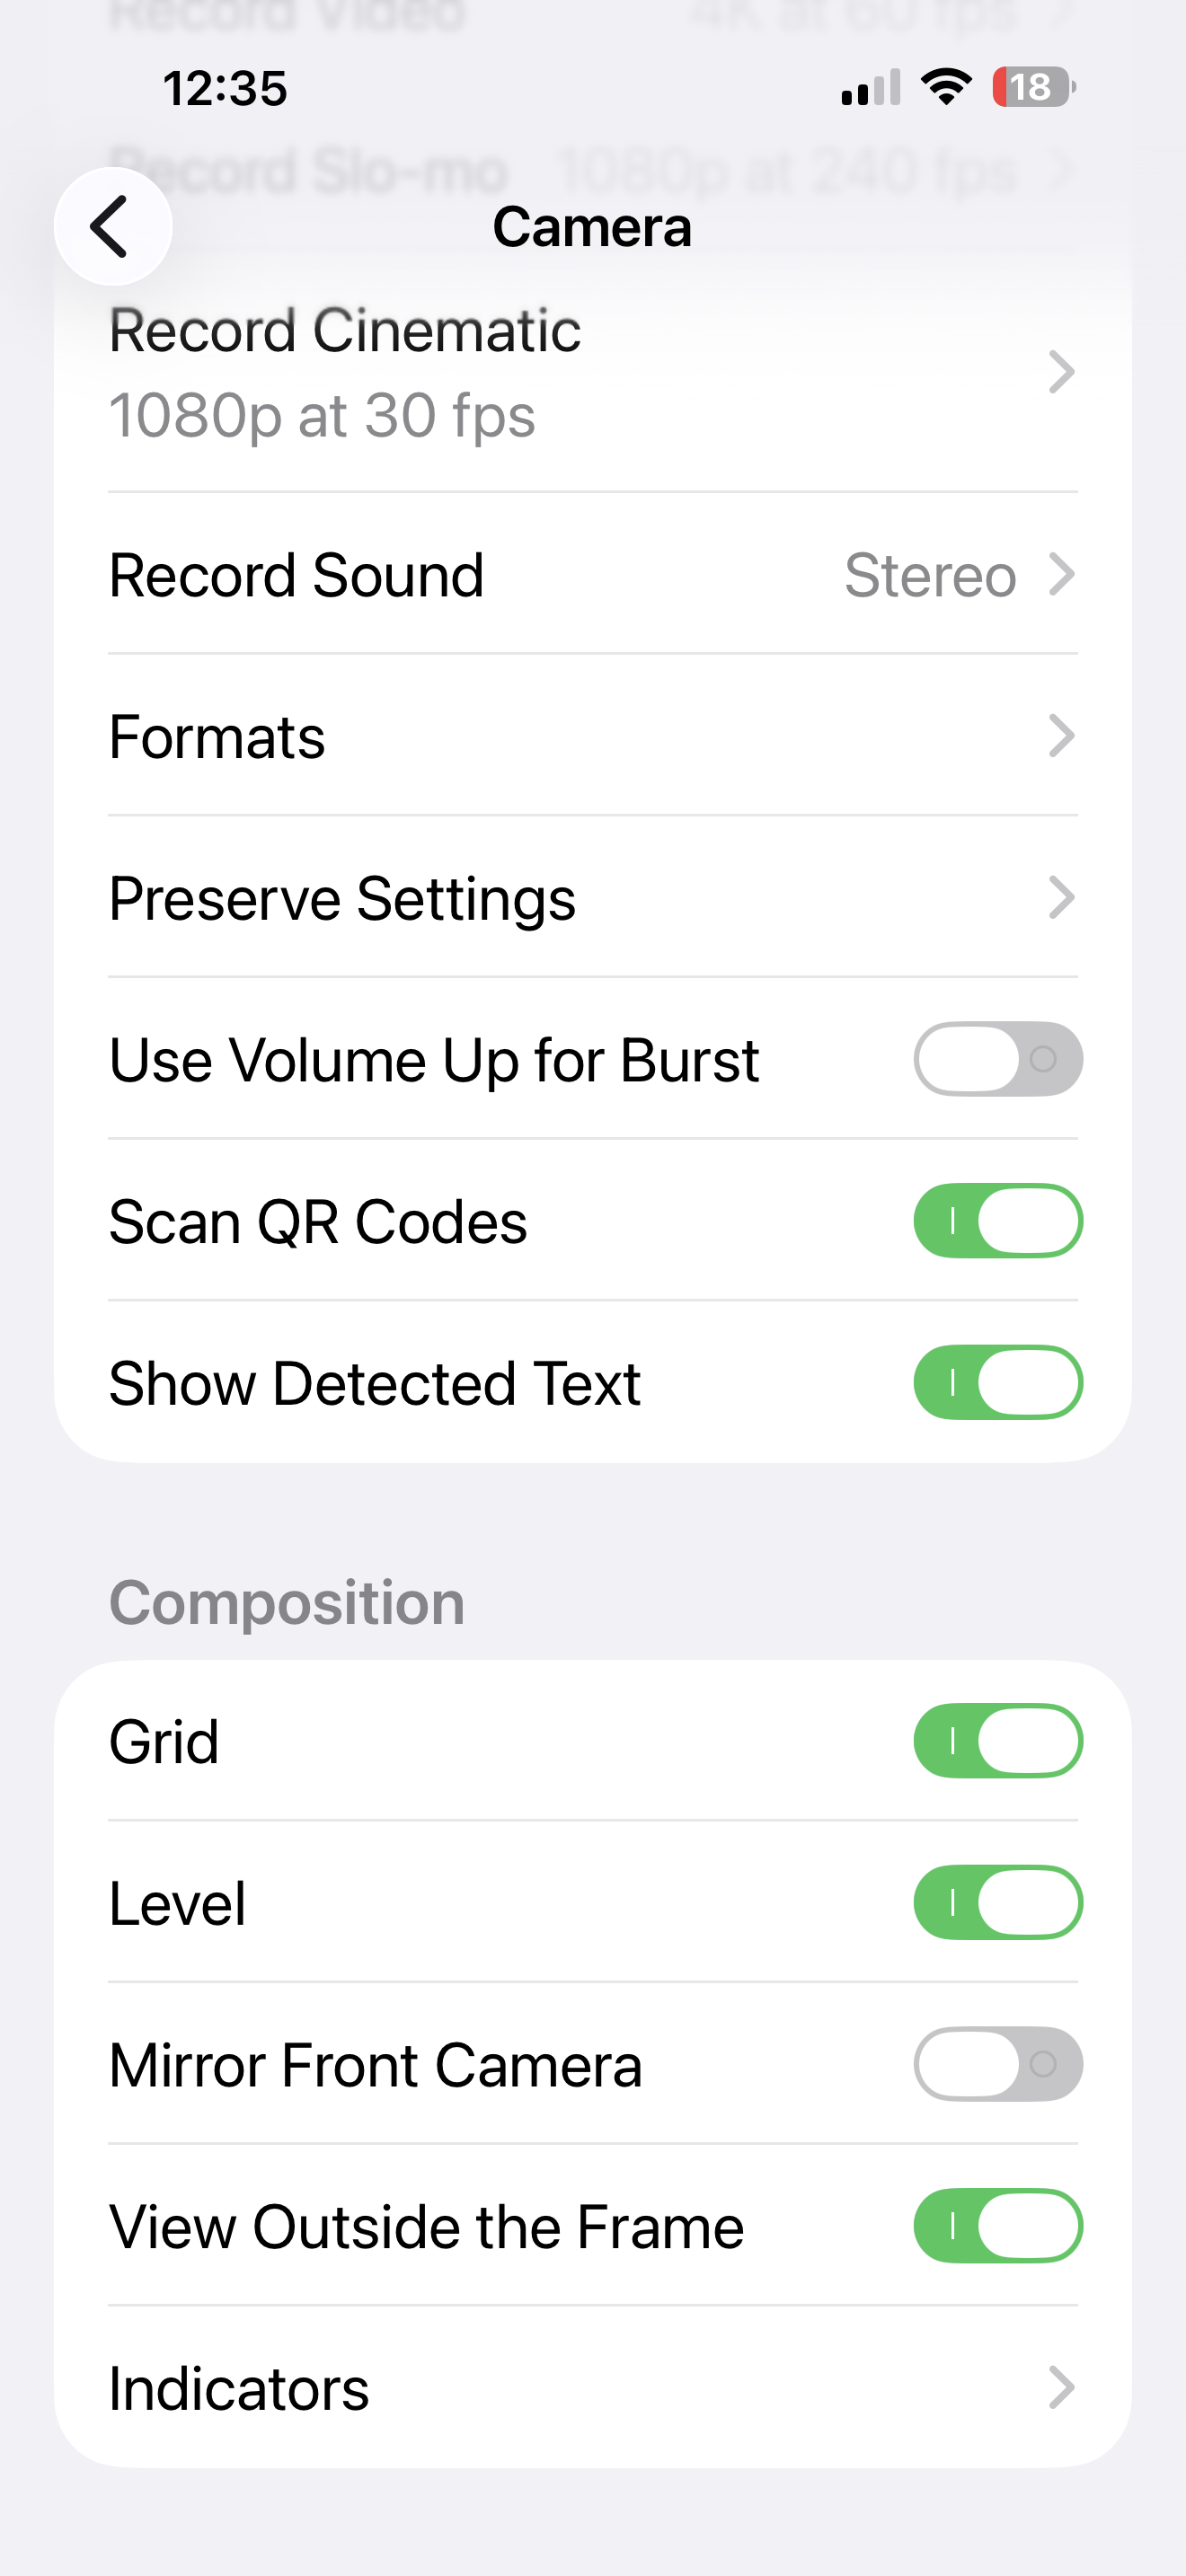
3. Turn on the level
This one is non-negotiable. Go to Settings → Camera → Level and turn it on. A small crosshair will appear on your screen that turns solid when your phone is perfectly level. Use it every single time. Tilted walls make a listing look unprofessional faster than almost anything else — it signals to buyers that nobody cared enough to pay attention to the details. If your verticals are vertical and your horizontals are horizontal, your photos will already look more polished than 80% of what's out there. 4. Shoot in landscape mode — always
Rotate your phone sideways before you walk through the door and leave it there. Portrait-mode listing photos look like a mistake. They're narrow, they're awkward in online galleries, and they make rooms look like closets. The only exception: portrait mode is actually great for social media content if you're pulling a shot for your Instagram stories or Reels. But for the MLS and any listing platform? Landscape, every single time. 5. Natural light only — and I mean it about the flash
Open every shade. Open every blind. Open every curtain. Natural light is your best friend and it costs nothing. And please — do not use your camera flash. Not once, not ever, not "just for the basement." Flash creates flat, harsh, unflattering light that makes every room look like a storage unit. If a space doesn't have enough natural light, the answer is better timing, not a flash. Use a tripod to allow your camera to have a super slow shutter speed. Trust me.6. Clean your lens before you shoot
This sounds so simple that people skip it, but a smudged lens is one of the top reasons phone photos come out soft, hazy, and low-contrast. You've been handling your phone all day — it's covered in fingerprints. Take five seconds and wipe it on your shirt before every single shoot. Your photos will immediately be sharper. Now Nail Your Composition
Camera settings get you 50% of the way there. The other 50% is how you set up and position yourself in the room. 1. Shoot from a corner — and try to get three walls
This is probably the single biggest compositional improvement most agents can make. Instead of standing in the doorway of a room and shooting straight in (which makes every room look small and flat), walk to the corner of the room and aim toward the opposite corner. When you do this, you capture two walls meeting in the foreground, which gives buyers a real sense of the room's depth, size, and layout. If you can capture three walls — even better. You're painting a picture of the whole space, not just one wall. 2. Open every single blind
I mentioned this in the settings section, but it bears repeating because I cannot tell you how many listing photos I've seen where one blind is halfway closed, or one window is blocked by a curtain. Go through the entire property before you pick up your phone and open everything. Every window. Every shade. Every blind. Natural light from multiple angles makes rooms feel warm, inviting, and livable. 3. Shoot from chest height
Not from eye level, not from hip level — chest height. When you hold your phone at chest height and aim slightly down into the room, you get the most natural, inviting perspective. It feels like what you'd actually see walking into the space. Eye level tends to cut off the ceiling and make rooms feel low. Hip level emphasizes the floor in a weird way. Chest height is the sweet spot, and once you train yourself to do it consistently, your photos will feel noticeably more professional. 4. Never use digital zoom — move your feet instead
If you want to get closer to something, walk toward it. Pinch-zooming on your phone degrades image quality immediately — you're essentially just cropping and enlarging pixels, which makes photos grainy and soft. The .5 ultra-wide lens gives you more room to work with than the standard lens, so use that extra angle and physically position yourself where you need to be. 5. Use a tripod if you have one
Even a simple, inexpensive phone tripod makes a difference for two reasons. First, it eliminates camera shake — especially in lower-light situations like bathrooms or basements where your phone's shutter speed slows down. Second, and honestly more importantly, it forces you to slow down. When your phone is on a tripod, you can't rush. You have to think about your composition, check your level, adjust your angle. That extra thirty seconds per shot adds up to significantly better photos throughout the home. The One Thing That Ties It All Together
Go back and look at every photo you take before you leave the property. Check that your vertical lines are actually vertical — walls, door frames, cabinets. Check that your horizon is level. Check that the window isn't blown out to a white rectangle. It takes five minutes to review your shots on-site, and it saves you from realizing when you're back at your desk that you need to go back. When to Call Me Instead
Here's my honest answer to that question. DIY phone photos are a reasonable choice for lower-price-point listings, quick refreshes, and situations where budget is tight. I respect that reality.
But there are situations where professional media isn't just nice to have — it's the tool that sells the listing:
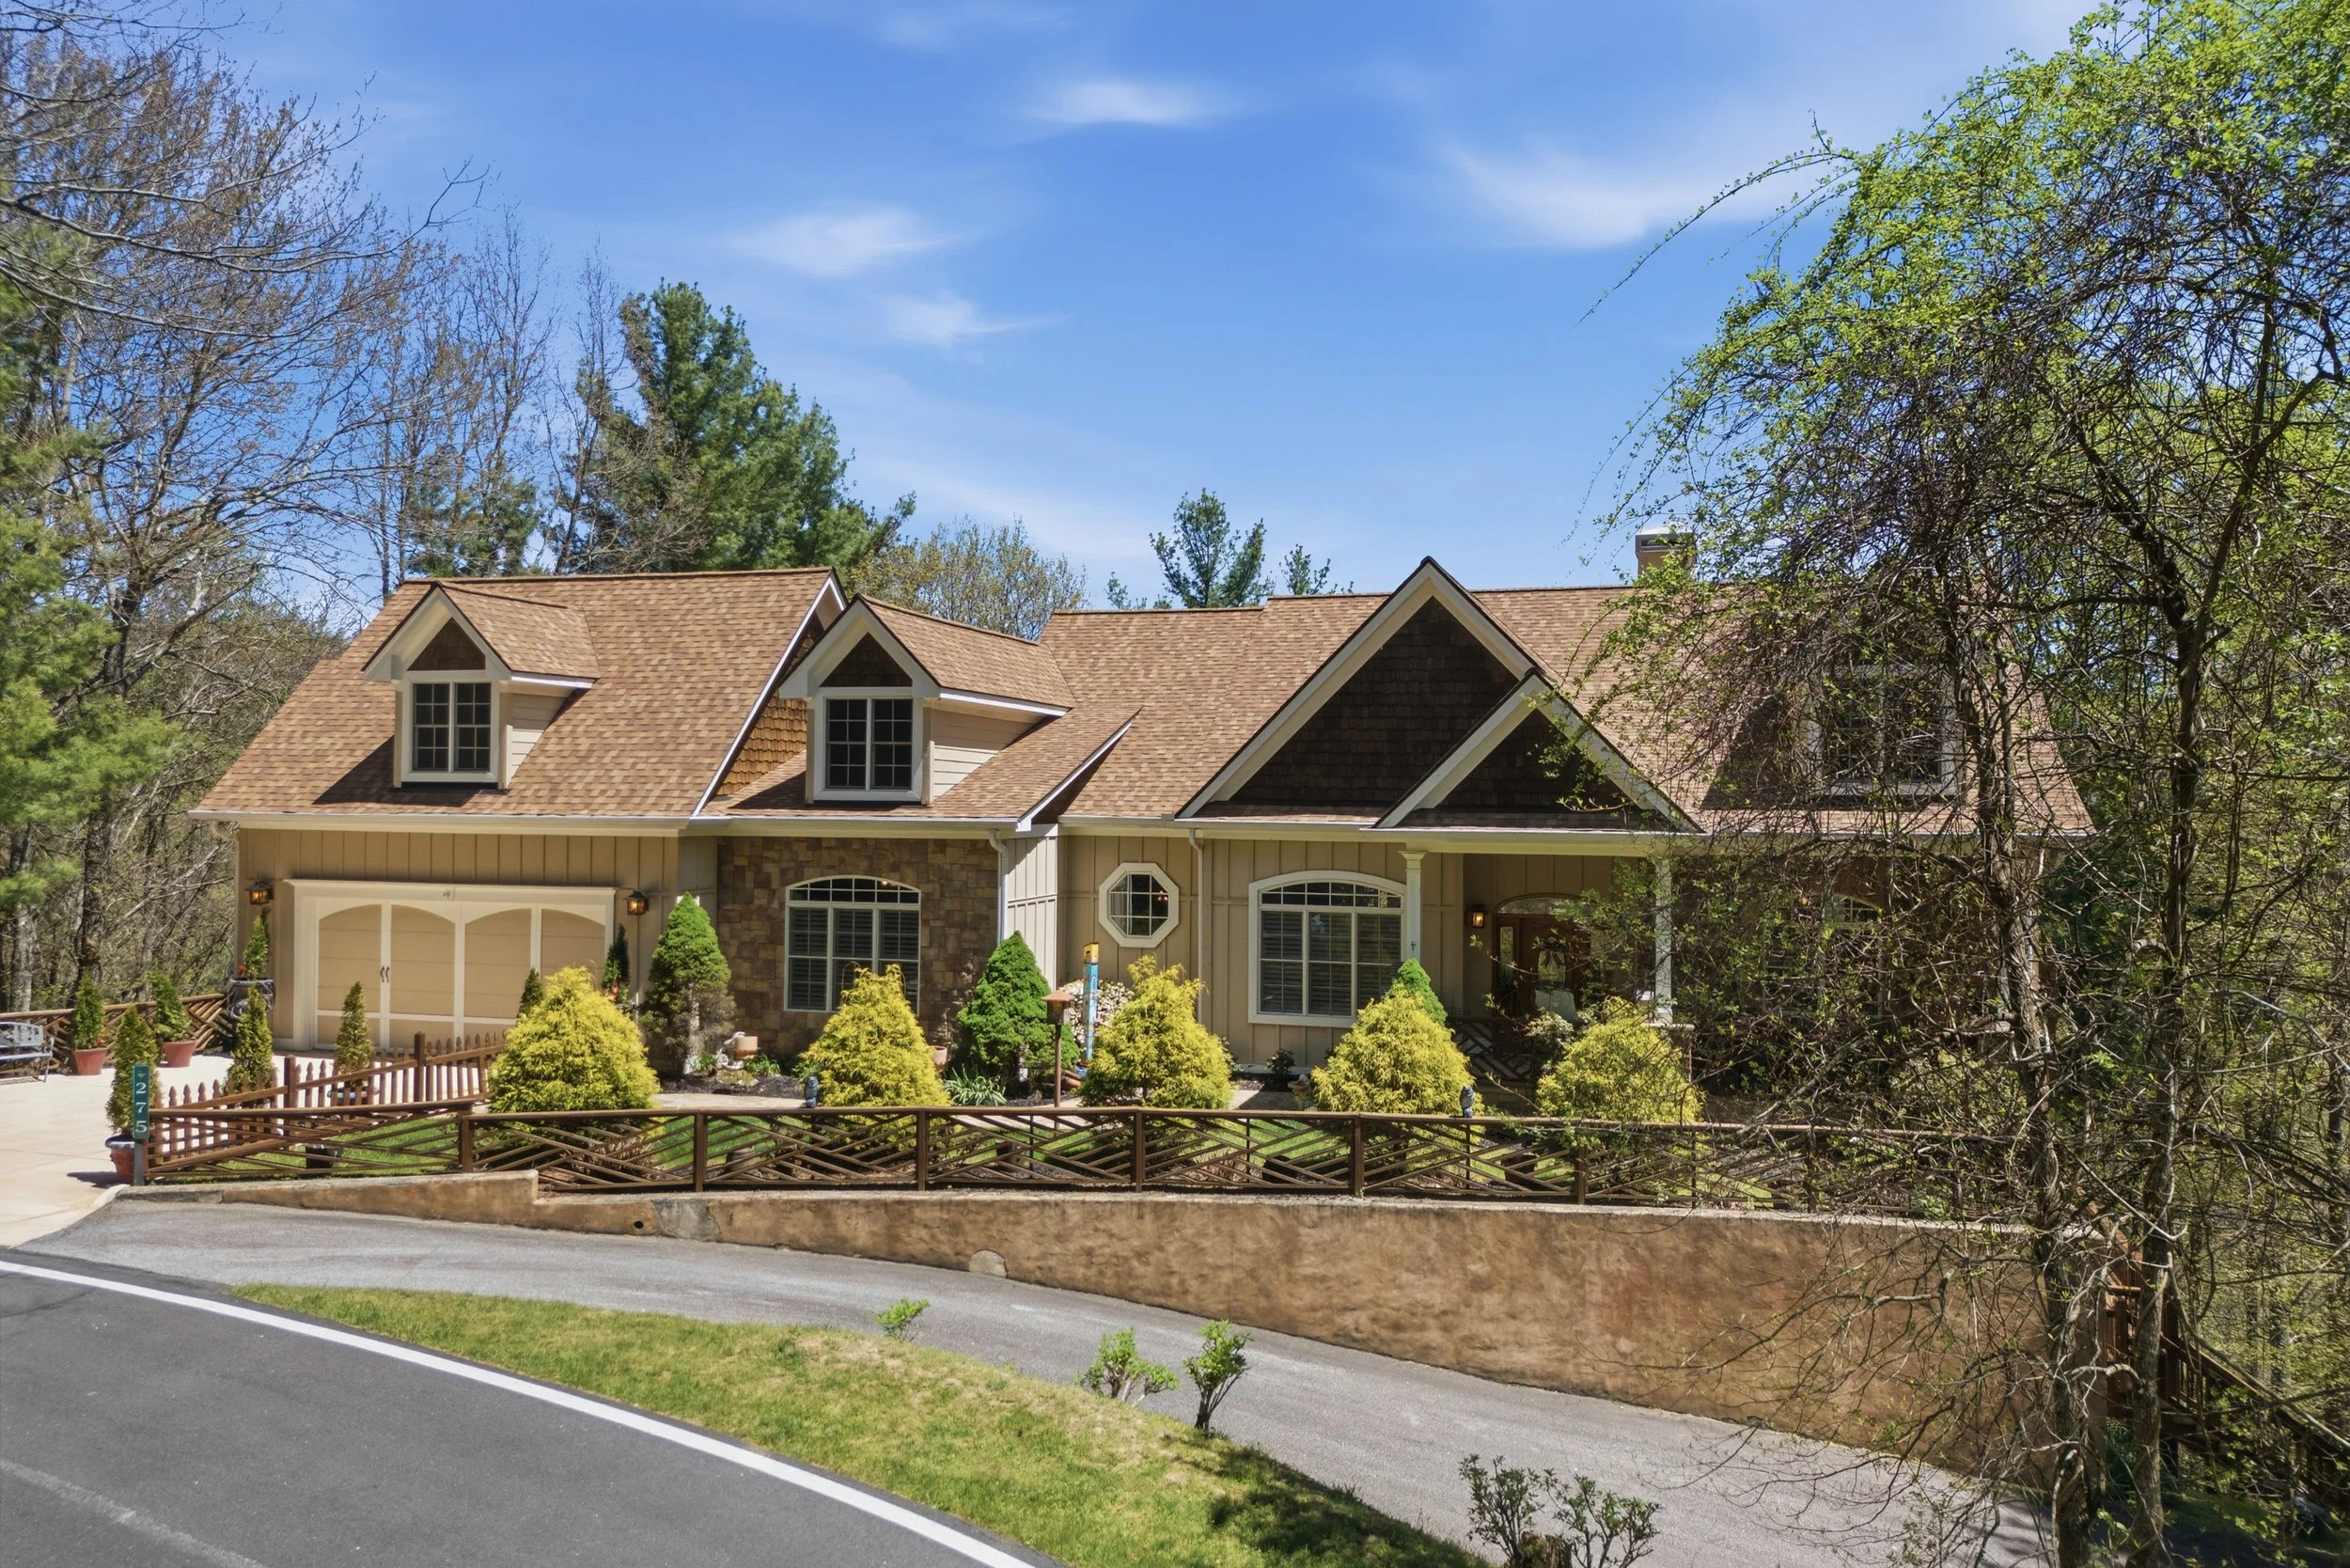
This was a difficult shot to get without a drone. Because of the lot and the land, you could not get a great shot of the front of the home without a drone. This is when you should call a professional FAA Certified Pilot.
1) Listings above $350K — at this price point, buyers have options and they're comparing.
2) Your first photo is competing with every other listing in that bracket. It needs to stop the scroll.
3) Lake or mountain view properties — the view is the listing. If buyers can't see it clearly, compellingly, and in context, you're leaving your most powerful selling feature on the table. This is what drone aerials are for.
4) Anything going on video or a 3D tour — phone video is a different animal entirely and almost never translates well to a professional listing presentation.
5) Any property with a unique story — historic homes, architect-designed properties, distinctive land — these need media that can tell the story, not just document the rooms.
6) Any listing where the first photo needs to do serious work — if you need buyers to feel something when they see it, that's a professional media call.
I'm always happy to talk through what a listing actually needs. Sometimes the answer is "your phone is totally fine for this one." Sometimes it's not. But either way, I'd rather you have the information to make the right call than guess.